A raised bed garden guide is the blueprint every aspiring vegetable grower needs before breaking ground. Raised beds offer superior drainage, warmer soil temperatures in spring, fewer weeds, and complete control over soil quality. They transform even the most challenging landscapes, whether compacted clay, rocky terrain, or contaminated urban lots, into productive growing spaces. This complete raised bed garden guide takes you from selecting materials and choosing dimensions through filling, planting, watering, and extending your growing season.
Raised beds have been used for centuries, from the chinampas of ancient Aztec agriculture to the intensive kitchen gardens of French monasteries. Today, they represent the gold standard for home vegetable gardening, recommended by University of Minnesota Extension and countless other agricultural programs as the most reliable way for beginners and experienced gardeners alike to maximize yields in limited space.
Choosing the Right Materials for Your Raised Bed
The material you choose affects longevity, cost, aesthetics, and food safety. Cedar and redwood are the traditional choices because they contain natural oils that resist rot without chemical treatment. Untreated Douglas fir and hemlock are more affordable but typically last only three to five years before decomposing. Modern composite lumber made from recycled plastic and wood fiber can last decades but costs significantly more upfront.
Here is a detailed comparison of the most common raised bed materials:
| Material | Estimated Lifespan | Cost per 4×8 Bed | Rot Resistance | Food Safety | Weight |
|---|---|---|---|---|---|
| Western Red Cedar | 15-20 years | $120 – $200 | Excellent (natural oils) | Safe | Moderate |
| Redwood | 15-20 years | $150 – $250 | Excellent (natural oils) | Safe | Moderate |
| Untreated Douglas Fir | 3-5 years | $40 – $80 | Low | Safe | Moderate |
| Composite Lumber | 25+ years | $200 – $400 | Excellent (no rot) | Safe | Heavy |
| Galvanized Steel | 20-30 years | $100 – $250 | Excellent | Safe (zinc coated) | Light to moderate |
| Concrete Blocks | Indefinite | $50 – $100 | Excellent | Safe | Very heavy |
| Pressure-Treated Pine (ACQ) | 10-15 years | $50 – $100 | Good | Acceptable (modern ACQ treatment) | Heavy when wet |
Avoid railroad ties, which contain creosote, and older pressure-treated wood containing chromated copper arsenate (CCA), both of which can leach harmful chemicals into soil. Modern pressure-treated lumber uses alkaline copper quaternary (ACQ) or copper azole, which the Gardeners.com raised bed materials guide considers acceptable for vegetable gardens, though many gardeners prefer naturally rot-resistant wood for peace of mind.
Optimal Dimensions for Raised Beds
The ideal raised bed is four feet wide, which allows you to reach the center from either side without stepping on the soil. Length can be anything, but six to eight feet is the most practical for residential gardens. Height depends on your situation: twelve inches is sufficient for most vegetables, but taller beds (18-24 inches) are better for root crops, areas with poor underlying soil, and gardeners with mobility issues who want to reduce bending.
Pathways between beds should be at least 18 inches wide for walking, or 36 inches if you need wheelbarrow access. Orient beds north to south to maximize even sun exposure across both sides. If your yard slopes, run beds along the contour to prevent soil erosion and uneven water distribution.
Site Selection and Preparation
Choose a location that receives at least six to eight hours of direct sunlight daily for vegetables. Avoid areas under large trees where root competition and shade will limit growth. Level the ground where your bed will sit, and if the area has grass, either remove the sod or lay cardboard over it as a weed barrier before placing the bed frame. The cardboard will decompose within a season, and the underlying grass will die without light.
Step-by-Step Construction Process
Building a basic 4×8-foot raised bed from cedar requires minimal tools and can be completed in under two hours. You will need four boards of 2×10-inch cedar (two at eight feet, two at four feet), eight 3-inch exterior wood screws per corner (32 total), a drill, and a measuring tape.
First, cut your lumber to size if necessary. Most home centers will make cuts for you at no charge. Stand the boards on edge and align the corners so the longer boards overlap the ends of the shorter boards. Pre-drill pilot holes to prevent splitting, then drive three-inch screws through the long boards into the end grain of the short boards, using four screws per corner for stability.
For beds taller than twelve inches, stack a second course of boards and secure them to the first course with screws or metal corner brackets. Adding a vertical stake at each corner and at the midpoint of the long sides prevents the walls from bowing outward under soil pressure. Use 2×4-inch stakes driven 12 inches into the ground and screwed to the inside of the bed walls.
Adding a Bottom Layer
If gophers or moles are a concern in your area, staple hardware cloth (half-inch mesh galvanized wire) across the bottom of the bed before placing it in position. For weed suppression, a single layer of cardboard on the ground beneath the bed is sufficient. Do not use landscape fabric, which eventually clogs and impedes beneficial organisms from moving between the bed soil and the native ground.
Filling Your Raised Bed with the Right Soil
Soil is the most important investment in your raised bed garden guide. A four-by-eight-foot bed that is twelve inches deep holds approximately 32 cubic feet of soil, roughly one cubic yard. The best fill is a blend of 60% high-quality topsoil, 30% homemade compost, and 10% aeration material such as perlite, pumice, or coarse vermiculite. This mixture, sometimes called Mel’s Mix (from the Square Foot Gardening method), provides excellent drainage, nutrient density, and root-friendly structure.
Buying bulk soil from a landscape supply company is far more economical than purchasing bagged soil from a garden center. Expect to pay $30-$60 per cubic yard for a topsoil-compost blend delivered. Fill the bed to within one inch of the top to allow for settling, and water thoroughly after filling. The soil will compact slightly over the first few days; top it off with additional mix before planting.
Planting Layout and Spacing
Raised beds lend themselves perfectly to intensive planting, where crops are spaced tightly in a grid pattern rather than widely spaced rows with wasted path space. The square foot gardening method divides the bed into one-foot squares, each planted with a specific number of plants based on their mature size. This raised bed garden guide recommends this approach for beginners because it eliminates guesswork about spacing.
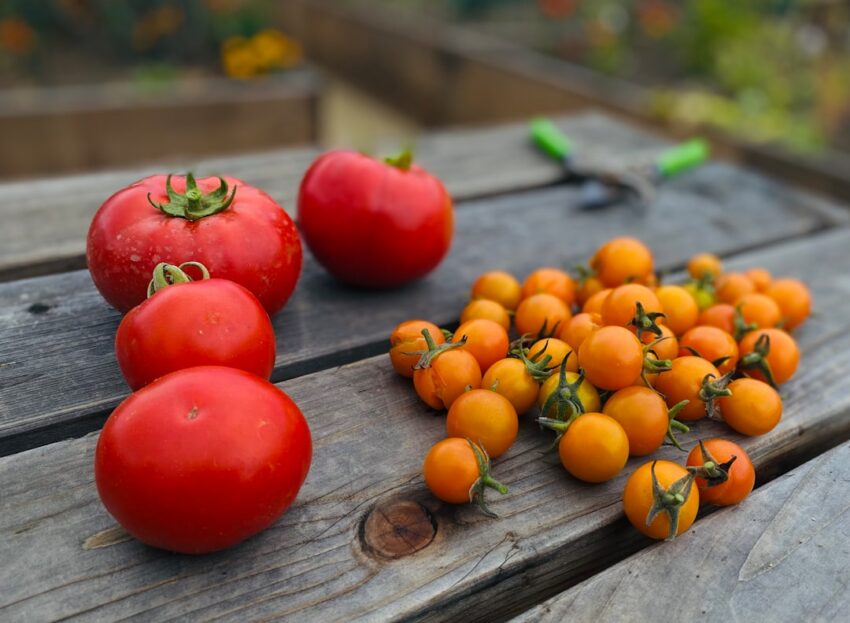
In a single 4×8-foot bed, you can grow a surprising diversity of food. Allocate the north end (back) for tall crops like tomatoes, peppers, and trellised cucumbers so they do not shade shorter plants. The middle section works well for medium-height crops like bush beans, chard, and kale. The south end (front) is ideal for low-growing crops like lettuce, radishes, herbs, and carrots.
Companion Planting Strategies
Certain plant combinations enhance growth, deter pests, or maximize space. Basil planted near tomatoes is believed to improve flavor and repel aphids. Marigolds around the bed perimeter deter nematodes and whiteflies. Tall corn or sunflowers can provide natural shade for heat-sensitive lettuce during midsummer. Avoid planting members of the same family (such as tomatoes, peppers, and eggplant) in the same spot year after year, as this encourages soil-borne diseases.
Watering Systems for Raised Beds
Raised beds drain faster than in-ground gardens, which is usually an advantage but means they require more frequent watering, especially in summer. The most efficient watering method is drip irrigation: a soaker hose or drip tape laid along the surface of the bed, connected to a timer. Drip systems deliver water directly to the root zone, reducing evaporation losses by up to 50% compared to overhead sprinklers, and keeping foliage dry, which reduces fungal disease.
A simple setup consists of a hose timer at the spigot, a pressure regulator, a filter, and drip tape with emitters spaced every twelve inches. Run the system for 30-45 minutes every one to two days during the growing season, adjusting based on rainfall and temperature. Mulch the soil surface with two to three inches of straw, shredded leaves, or wood chips to further reduce water loss and suppress weeds. The USDA Plant Hardiness Zone Map helps determine your region’s typical rainfall patterns and frost dates for planning irrigation schedules.
Extending the Growing Season
One of the greatest advantages of raised beds is how easily they accommodate season extension structures. A simple hoop house made from half-inch PVC pipe bent over the bed and covered with greenhouse plastic or row cover fabric can add four to six weeks on each end of the growing season. In USDA zones 5-7, this means planting as early as late February and harvesting into December.
Cold frames, essentially bottomless boxes with glass or polycarbonate lids placed over a section of the bed, create a miniature greenhouse environment. On sunny winter days, temperatures inside a cold frame can reach 80 degrees Fahrenheit even when outside temperatures are near freezing. Prop the lid open on warm days to prevent overheating, and close it at night to trap warmth.
Fall and Winter Crops for Raised Beds
Many gardeners abandon their raised beds after the summer harvest, but cool-season crops like kale, spinach, carrots, beets, and garlic thrive in fall and can overwinter with minimal protection. Plant fall crops eight to ten weeks before your first expected frost date. Garlic, planted in October or November, overwinters in the bed and produces large bulbs by the following July. These cold-hardy crops sweeten after frost exposure, making them some of the best-tasting vegetables you will ever grow.
Maintaining Your Raised Bed Year After Year
Each spring, add two to three inches of fresh compost to the top of your raised bed. The soil level drops as organic matter decomposes, so annual replenishment is necessary to maintain volume and fertility. Rotate crop families each year to prevent disease buildup: if tomatoes grew in the north section last year, plant them in a different area this year and put legumes (beans, peas) in the old tomato spot to replenish nitrogen.
Inspect the wood frame annually for signs of rot. Cedar beds typically last 15-20 years before needing replacement, but catching a rotting board early and replacing just that section extends the overall life of the structure significantly. Check corner connections for looseness and re-drive screws as needed.
Frequently Asked Questions
How deep should a raised bed be for vegetables?
A minimum depth of twelve inches accommodates most vegetables, including tomatoes, peppers, and lettuce. For deep-rooted crops like carrots, parsnips, and potatoes, eighteen to twenty-four inches is preferable. Taller beds also reduce bending, which benefits gardeners with back or knee issues.
Do raised beds need a bottom or can they sit on the ground?
Raised beds do not need a solid bottom and perform best sitting directly on the ground, which allows earthworms and beneficial microbes to move into the bed soil. Only add hardware cloth if burrowing pests are a problem. Avoid solid bottoms or landscape fabric, which impede drainage and biological activity.
How much does it cost to build and fill a raised bed?
A basic 4×8-foot cedar bed costs $120-$200 for lumber. Filling it with quality soil costs $30-$60 for bulk delivery. Total first-year investment is approximately $150-$260. Untreated fir reduces the lumber cost to $40-$80 but requires replacement sooner. Soil is a one-time expense; annual compost top-ups cost $10-$20.
Is pressure-treated wood safe for raised vegetable beds?
Modern pressure-treated lumber using ACQ (alkaline copper quaternary) or copper azole is considered safe by most extension programs. The older CCA (chromated copper arsenate) treatment, banned for residential use since 2004, is not safe. If concerned, line the interior of treated wood beds with heavy-duty plastic sheeting as a barrier.
What vegetables grow best in raised beds?
Nearly all vegetables perform excellently in raised beds. If you are just starting out, our container gardening for beginners guide is another great starting point. Tomatoes, peppers, lettuce, beans, carrots, radishes, onions, garlic, squash, cucumbers, and herbs all thrive. The improved drainage and soil quality of raised beds typically increase yields by 25-50% compared to in-ground planting in average soil conditions.
Disclaimer: The construction and gardening recommendations in this article are intended for general informational purposes. Building codes, material availability, and growing conditions vary by location. Consult local building regulations before constructing permanent garden structures, and contact your regional cooperative extension service for soil testing and planting guidance specific to your area. This content does not constitute professional construction or agricultural advice.